
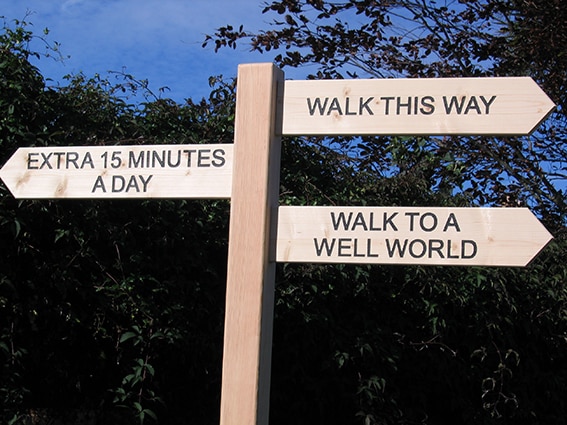
When planning signage for a walking trail, well-placed wooden finger posts belong at key decision points. These are the spots where visitors need help choosing which way to go, such as entrances, path junctions, unexpected turns and connections with other routes.
But not every part of the trail needs a finger post, and with too many signs it’s easy to create confusion or distraction from the surroundings.
This guide will help you decide:
- Where wooden finger posts are useful for walking trails, parks and rural estates
- Where other types of woodland signs work better
- How to create a clear, joined-up signage system
How to start planning signage for a walking trail
Start your signage planning by walking the entire trail from the perspective of someone who has never visited before. Better still, do the walk with someone who really is brand new to it. This is your foundation for deciding where to put wooden finger posts along it.
Familiarity can make confusing parts of a route seem obvious, so focus on the moments where a new visitor might hesitate.
Walk the route in both directions and make a note of:
- Junctions where more than one path looks plausible
- Turns that aren’t obvious from the direction of travel
- Places where several walking trails meet
- Long sections where visitors may wonder if they’re still on the right path
- Routes leading to facilities or points of interest
- Places where vegetation could obscure a sign
- Return routes to car parks, entrances or visitor centres
Top tip: Don’t solely rely on flat outdoor signage displaying maps of the area. A junction that looks straightforward on these can feel very different in real life.
Where to place wooden finger posts along a walking trail
Wooden finger posts work best where walkers need clear directional information to choose what to do next. If you’re working with a limited signage budget, The Noticeboard Company suggests that identifying these key decision points can help you prioritise where finger posts will have the most impact, rather than spacing them at regular intervals or using them where a simpler waymarker would do the job. Let’s look at some of those key points:
The start of the trail
Clearly identify where walking routes begin, particularly where several paths leave the same car park, visitor centre or entrance. A wooden finger post can direct walkers towards the correct path, while a woodland ladder sign can provide a larger welcome or identification sign at the entrance to the site
Where paths split or cross
Use wooden finger posts at forks, crossroads, and multi-route junctions. If different trails share part of the same path, make it clear which routes continue in each direction.
Where the route takes an unexpected turn
A sign can prevent walkers from instinctively carrying straight on when the marked route turns onto a less obvious path.
Where trails connect
Show walkers where routes meet and provide clear directions if they have the option to switch trails or extend their walk.
On the way back
Consider every junction from both directions on a walking trail. Signage that makes perfect sense on the outward journey may be useless to someone trying to find their way back to the start.
Use wooden finger posts to direct visitors to key destinations
Wooden finger posts can also help visitors find important facilities and points of interest that sit on or close to a walking route, such as:
- Viewpoints
- Picnic areas
- Toilets
- Cafés
- Play areas
- Visitor centres
- Car parks
- Nearby villages or attractions
- On the way back
When to use waymarkers and woodland signs
Small woodland signs and waymarkers instead of finger posts can help confirm that visitors are still heading in the right direction. This is particularly useful after junctions or on long stretches of trail where obvious landmarks may not exist.
A simple principle can help when planning your signage:
- Direction signage at decision points
- Reassurance signage in between
This avoids unnecessary finger posts while giving walkers confidence that they haven’t accidentally wandered off the trail.
How to create a walking trail signage system with a clear hierarchy
Create a clear walking trail signage hierarchy by matching different types of signage to specific stages of the visitor journey. This prevents individual signs from becoming overloaded and helps visitors quickly recognise where to look for the information they need.
This table demonstrates a hierarchical signage system:
| Point in a walking trail | What does the visitor need? | Type of signage needed |
|---|---|---|
| Trail entrance | Orientation and route information | Woodland ladder sign or information board |
| Path junction | Direction | Wooden finger post |
| Between junctions or on long stretches of path | Reassurance | Waymarker or woodland sign |
| Information point | Additional practical information | Woodland information post |
| Point of interest | Context or explanation | Woodland lectern or Interpretation panel |
| Destination | Confirmation | Identification sign |
Creating this signage hierarchy makes the route easier to understand at a glance. Visitors learn what different types of signs mean and can concentrate on enjoying their surroundings rather than continually interpreting new instructions.
Related reading: If you’re planning signage for a nature reserve specifically, our guide to what signs you need at a nature reserve looks at these different requirements in more detail.
What information should wooden finger posts include?
A finger post should give walkers the information they need to make their next decision quickly, such as a destination or trail name. Use information boards and interpretation panels for more detailed content. Keep finger posts focused on wayfinding.
Depending on the trail, a finger post may include:
- Destination or trail name
- Direction
- Distance
- Approximate walking time
- Route colour
- Symbols showing permitted trail uses
- Relevant access information
- Simple illustrations where useful
Top tip: Keep terminology consistent across signage for your whole site. If a destination is called the “Woodland Trail” at the entrance, for example, use the same name on every subsequent sign.
Plan your woodland signage with Notice Boards Online
At Noticeboards Online, we understand that every walking trail, rural estate and park has different routes, surroundings and visitor needs, and that their signage should reflect them.
We work with our clients to create joined-up woodland signage for parks, trails, nature reserves and countryside settings, from bespoke wooden finger posts and information posts to ladder signs and interpretation panels. Tell us what you need for your site and request a quote today.